How To Transfer Photos From iPhone To Laptop With Or Without iTunes On Win/Mac Computers: Do It Yourself Guide
Listen To This Article
There are a number of different methods, with and without iTunes, to Import Photos from iPhone to Mac or Windows laptops. In this article, we’ll show you how to import photos from iPhone without data loss.
Introduction
Now that holiday season is over, I’m sure everyone will be busy saving hundreds of funny family Christmas pictures/photos/images with their iPhones. However, are you concerned about how to import photos from iPhone to your laptop in a safe and simple manner?
There are a lot of methods to import photos from iPhone. The most popular — but also most difficult method — is using iTunes. However, in this article, we’ll show you a number of different methods to import photos from iPhone to Windows and Mac computers, both with and without iTunes.
In this article, we’ll give you a detailed overview of how to import photos from iPhone, with or without iTunes, for both Windows and Mac computers, without data loss.
PART 1: How to Import Photos from iPhone with iTunes
iTunes is the most popular and official method to import photos from iPhone. It can be used in both Windows and Mac computers. However, it’s extremely difficult to use and people often get fed up with it.
The following steps will show you how to import photos from iPhone using iTunes:
1. Update the latest iTunes in your computer.
2. Access iTunes and connect your iPhone to your PC using a data cable.
3. Click on the Device icon on the left of your toolbar.
4. Select the Photos option from the panel on the left side of the window.
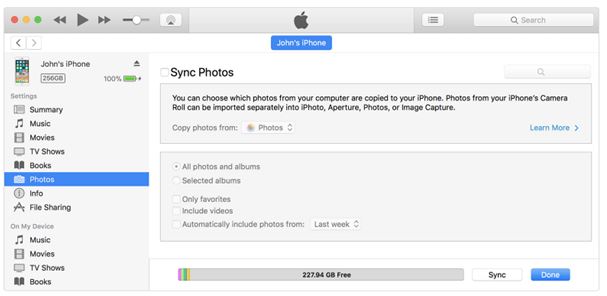
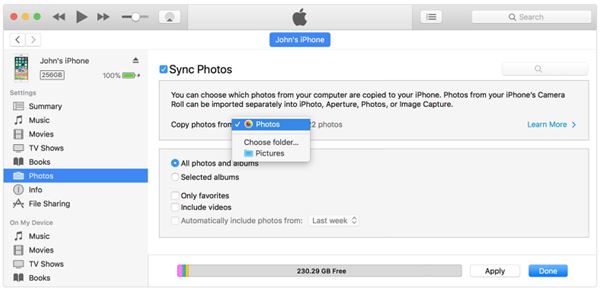
5. Click on the Sync button so all the images from your iPhone get synced to your iCloud. If it’s already synced, you can skip this step. Select a destination for the photos to be imported to. You can select the Include Videos option if you want to import videos as well. Click on Apply once you’re done.
Problems with using iTunes:
> iTunes is extremely unpredictable. It doesn’t always function correctly.
> It’s not user-friendly at all.
> Sometimes it leads to data loss as you might accidentally erase all the content in your iPhone.
PART 2: How to Import Photos from iPhone using Dr.Fone - Transfer.
Dr.Fone - Transfer is my favorite method to import photos from iPhone to Mac or Windows computers. It’s a third-party user-friendly third party toolkit developed by the world’s leading technology enterprise Wondershare. It has a wide range of features and it can be used to import photos from iPhone to computer easily with a few clicks.
Dr.Fone - Transfer
Import Photos from iPhone to Windows or Mac Laptops without iTunes.
> Can transfer photos from iPhone to computer and vice versa with a single click.
> Can also transfer photos from computer to iPhone.
> In addition to photos, can also transfer music, contacts, SMS, and other data.
> Compatible with iPhone XS, iPhone XS Max, and all other iPhone models.
> Compatible with all iOS versions and all Windows and Mac OS versions.
> Can also transfer photos to and from Android phones.
How to Import Photos from iPhone:
1. After you download dr.fone, install and launch the application.
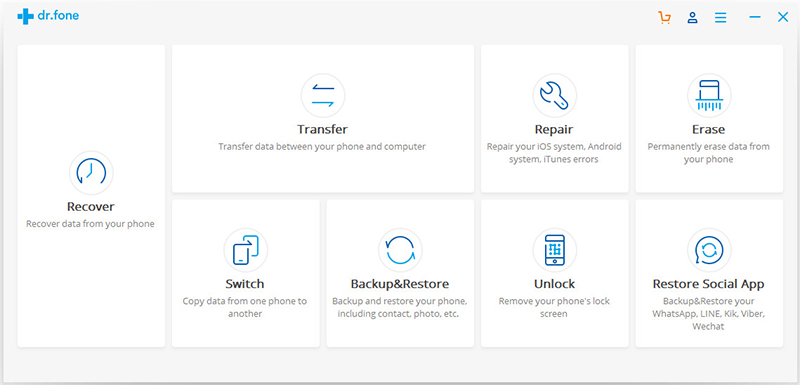
2. From the main menu, select the ‘Transfer’ icon.
3. Connect your iPhone to the computer. In the next screen, click on ‘Transfer Device Media to PC’.
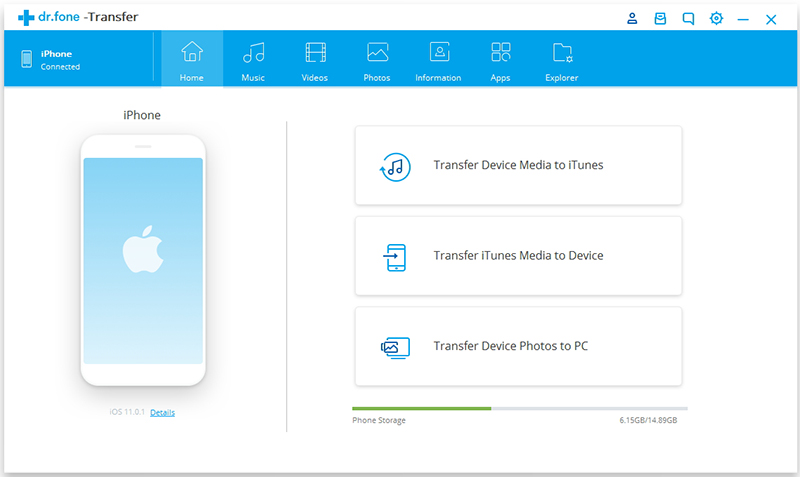
4. From the toolbar at the top, select the ‘Photos’ option. Now select all the pictures and media files that you want to send to computer and click on ‘Export to PC’Select the destination folder.
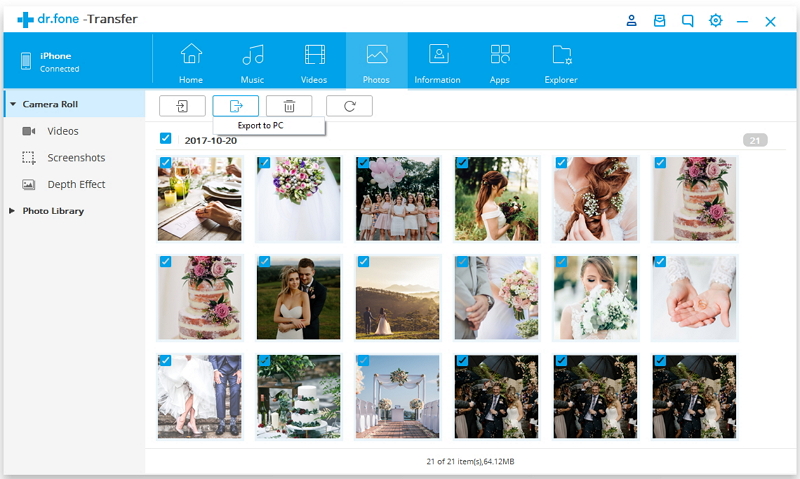
Why Dr.Fone — Transfer is the best method to import photos from iPhone:
> It can be used to import photos from iPhone to both Mac and Windows computers.
> The process is simple and easy to follow.
> There’s no scope for data loss. You will retain the photos in your iPhone and your computer.
PART 3: How to Import Photos from iPhone to Windows Laptop using AutoPlay
1. Connect your iPhone to the Windows computer using a data cable.
2. The AutoPlay window will automatically show up. Select the ‘Import Pictures and Videos’ options.
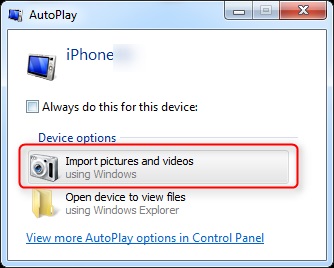
3. Wait for AutoPlay to detect all your iPhone photos.
4. Using the Import setting, create a destination for the photos and send them.
Problems with using Windows AutoPlay:
> Can only work for Windows computers.
> It’s possible that it might reformat your iPhone and you might lose all your pictures.
PART 4: How to Import Photos from iPhone to Mac Laptop using iCloud
1. Go to your iPhone’s Settings > iCloud > Photo Stream.
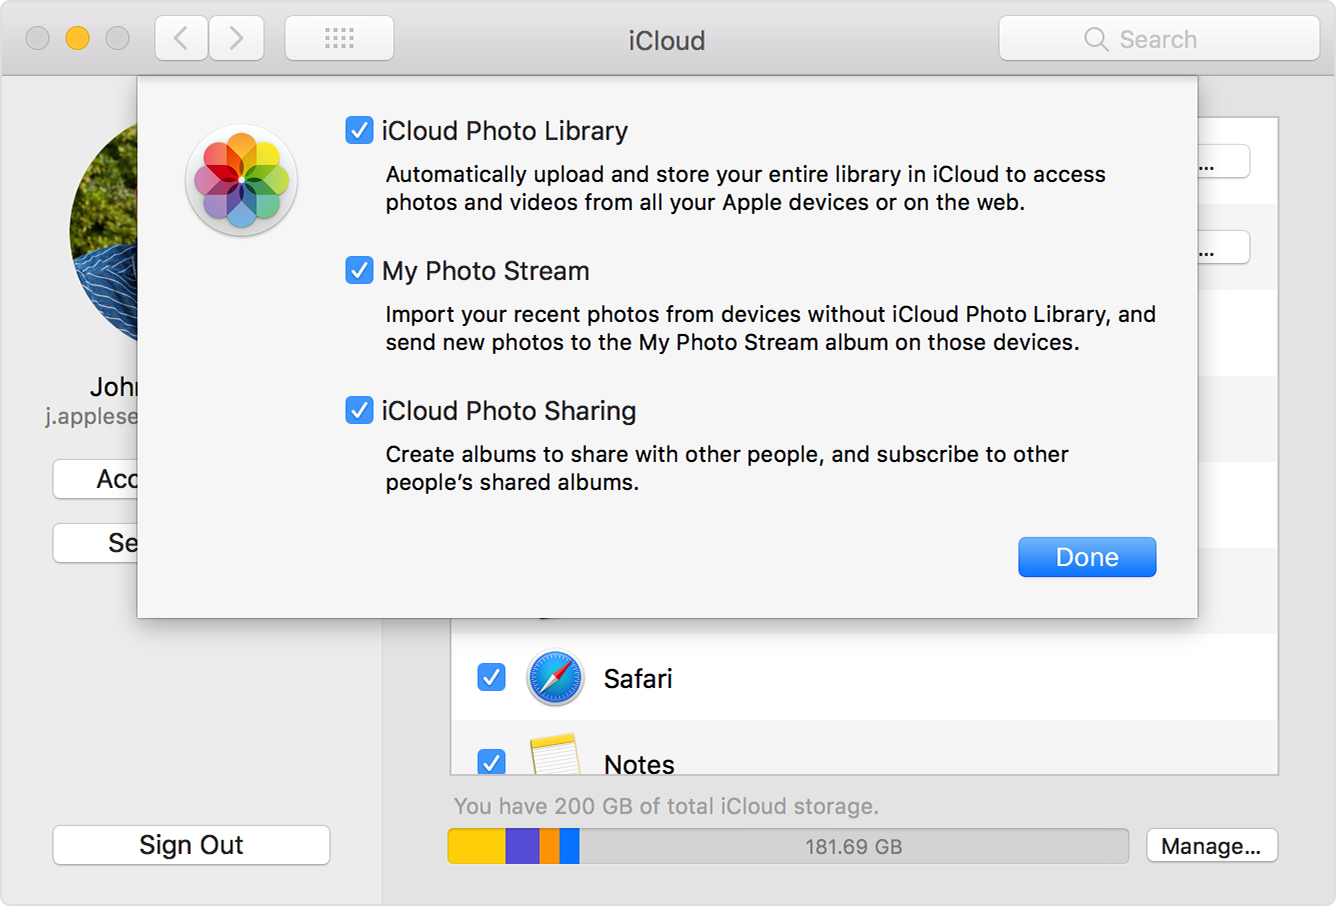
2. Turn the Toggle switch On so all your photos get uploaded to the iCloud. Make sure that your WiFi is turned on and stable.
3. Go to www.icloud.com and log in with your Apple ID and Password.
4. All your photos will be available in the Photos folder. Select the files you want to import, click on the Download button, and select a destination.
5. Alternatively, you can also access iPhoto in your Mac, click on Import Selected, select the photos and choose a destination.
Problems with using iCloud:
> Can only work over the internet. You’ll first have to upload all the pictures from iPhone to iCloud, and then download them over the internet.
> It’s time-consuming.
> Will consume a lot of internet data.
> Will require fast and steady internet.
Conclusion
I hope this article has shown you how to import photos from iPhone with and without iTunes, for both Mac and Windows computers. Dr.Fone - Transfer can help you import photos from iPhone to both Mac and Windows computers, without relying on the internet or leading to data loss. The other methods can also be used, but they come with specific drawbacks and problems that dr.fone addresses in its solution.
If you have any other questions about how to import photos from iPhone, feel free to let us know.


